It turns out that Synology has a reverse proxy that is user configurable. It just happens to be hidden.
What is a reverse proxy?
Basically, it is a traffic cop that directs traffic headed into a single IP to a specific port on the server based on the name used in the request. Here is the real example I am using:
I want to have my Heimdall container available on my Synology. Not a problem, I can add that pretty simply through the Container Manager. But it wants access to port 80 (the default HTTP web port). Since the Synology already uses this port (and won’t allow you to setup a container on port 80) I set it up on port 85.
Next, I setup my local DNS to point to send heimdall.local to my Synology. The problem is I cannot specify a specific port in the DNS (see my last article that discusses DNS). That is where a reverse proxy comes in. When it sees an incoming request to the Synology from “heimdall.local” it needs to automatically send that directly to port 85
Setting it up
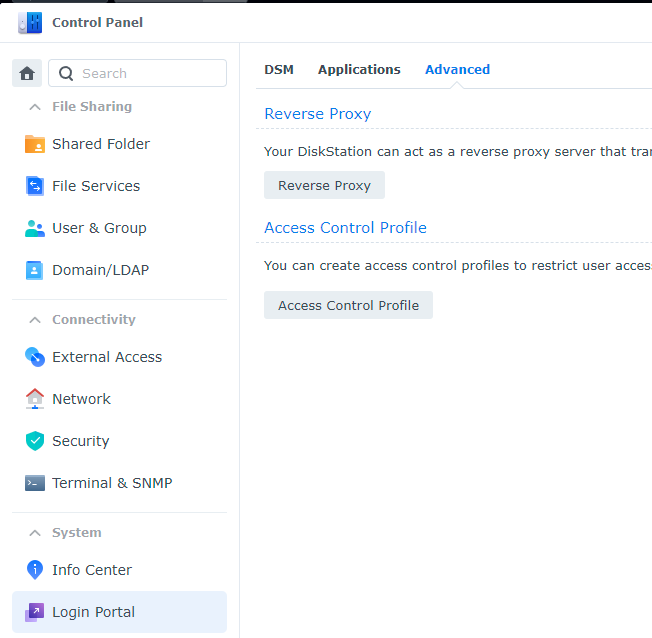
This is fairly straightforward. First, open the control panel and select the “Login Portal” setting. Choose the Advanced tab and you will see the Reverse Proxy setup button:

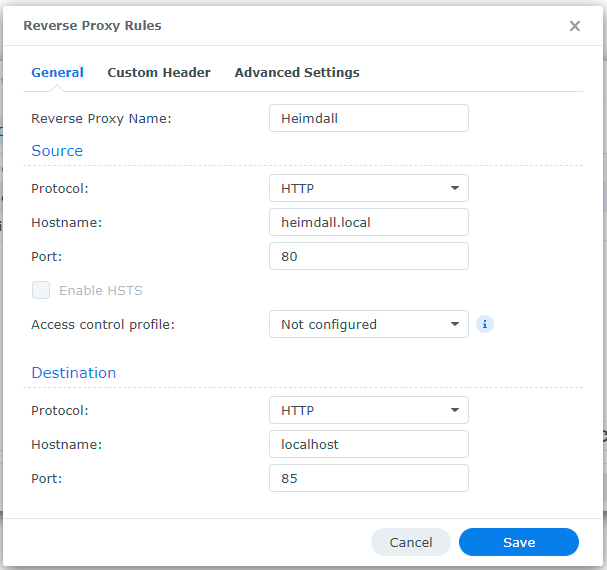
Click that and then click create to add a new rule. The hostname is the incoming name that is being requested (and the port upon which it is being requested, which for our purposes will be 80 on HTTP or 443 on HTTPS) while the destination settings are where it lives on the synology. Here is the current setup:
